
It's just possible that you, a sentient being with active sensory input, have cause for concern about the security of data hosted both in the United States and by Microsoft. GitHub has been ubiquitous and indispensable for technologists. But maybe it's time to reconsider that status.
Don't feel like reading? Skip to the cheat sheet for the full procedure.
Look, I really like using GitHub. If you're a developer, or someone who interacts with a lot of open source projects, GitHub has been The Place To Be™ for years now. It's even an assumed component of a resume for many jobs in tech. I personally have hundreds of starred repositories on my GitHub account, and my projects have benefited from its ubiquity and ease of use.
H O W E V E R...
GitHub is not the only Git hosting service in town. In fact, there are a bunch of other towns, and GitHub's neighborhood is getting shady as hell. Between Microsoft's seeming inability to keep nation state actors out of its business, the US government's questionable choices around cybersecurity, and GitHub's use of everyone's code to train its language models, I felt it was time to seek greener pastures for my code.
You ever have something that you know in your bones is the right thing to do, but it seems unreasonably onerous? Moving off GitHub has felt that way for me for quite some time. While you can't always choose an ethical option in a culture of consumption, this one felt important enough to try. My technical efforts contributing to a technology I vehemently oppose did not sit well with me.
So I finally made the leap. And you know what? It wasn't that hard.
Forgejo and Codeberg
I moved all my code to Codeberg. I had heard positive things about it on Mastodon, and had even created an account there previously to interact with some projects.The interface seemed rather GitHub-y, but that didn't mean it had the capacity to replace GitHub for my purposes. So I read the docs.
Codeberg is the flagship instance of Forgejo (pronounced "for-JAY-o"), an open source Git repository. There are others, like Gitea, but I'll tell you what makes Forgejo/Codeberg special: Codeberg e.V., a German non-profit that maintains the project. I'm particularly impressed by the transparency and openness of the organization, as described in their bylaws.
There's an irony in this American turning to a German organization for some kind of freedom in this chapter of history. I'll leave you to tease that out.
You can self-host Forgejo, and there are other public instances. But since Codeberg is a turn-key option, and has all the data protections of the EU to boot, it seemed like a reasonable exit strategy from GitHub. Here's how I did it.
Migration
You'd think the first step is to make a Codeberg account, and that's definitely the second step. But to make your transition as easy as possible, I recommend you start at your GitHub account—specifically, your personal access tokens—and create a new one for Codeberg. This new "classic" token (because it needs access to all your repositories) requires all repo permissions. Save the token once created in someplace secure. I recommend a password manager.
Now go make sure you have a Codeberg account. Once logged in, click on the "+" button by your profile picture, and click "New migration."
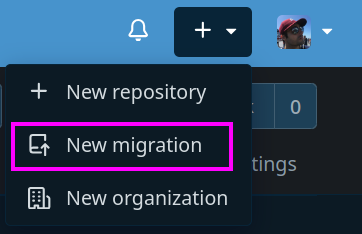
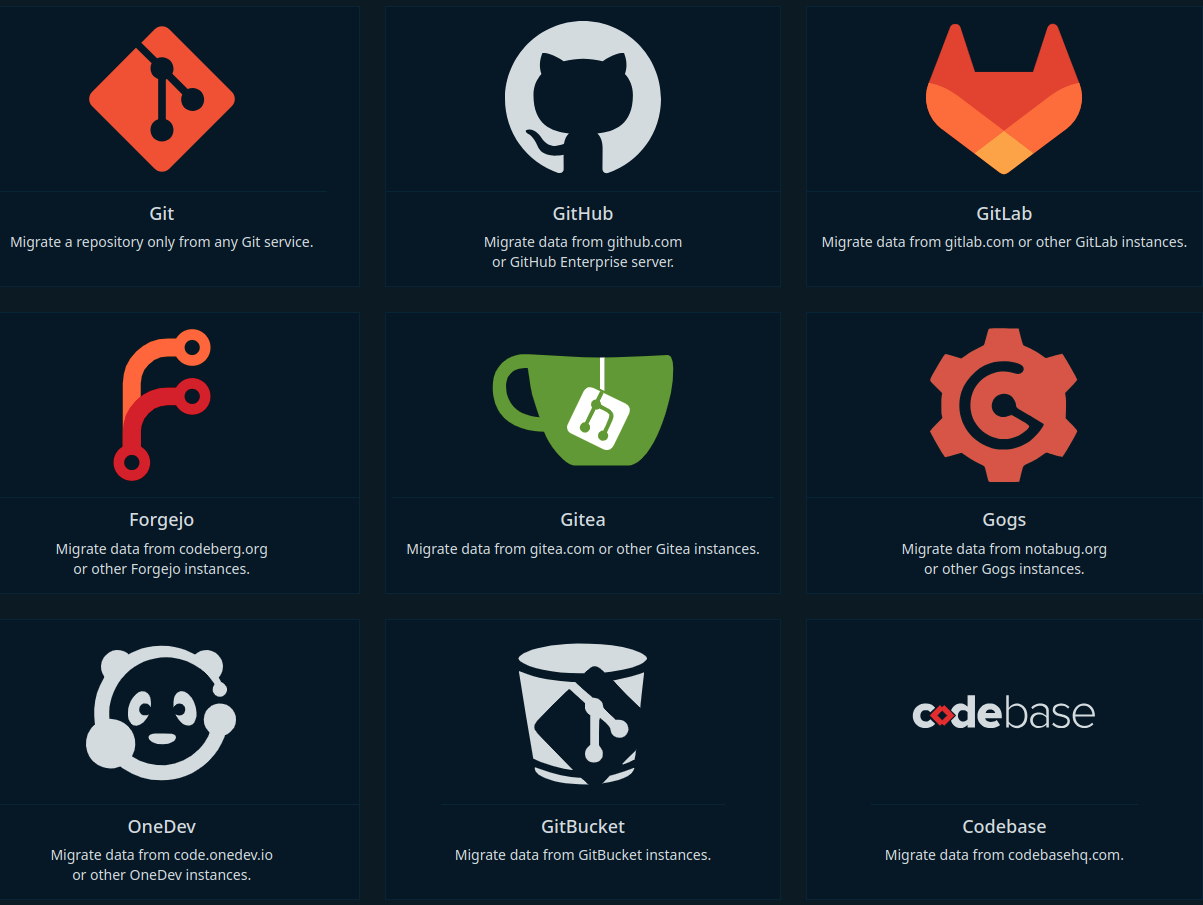
Or just go right there. As you can see, there are a bunch of migration options. We're focusing on GitHub, but if you have repositories on GitLab or other services, Codeberg/Forgejo will help you migrate those repos too.
Time to fill in a form! Add the URL of your source repo, and your access token (for private repos or if you want the issues, pull requests. etc.). Make sure to check the "Make repository private" box for any private repos—we don't want to accidentally disclose sensitive code/data. And then migrate! Codeberg also has organizations, if some of your repos are owned by orgs rather than individuals. You can make those before migration and use them as target owners.
Migrations can take a few minutes to complete, but I've never had one fail. I was quite impressed with the smoothness of this process.
This process can take a while if you have a repository problem like me. My first instinct when solving a technical problem often involves git init. It is absolutely possible to combine GitHub and Forgejo REST APIs to script an automated migration process, but I leave that as an exercise for the reader. In truth, I found the manual review both an enjoyable walk down memory lane, and an opportunity to delete/archive repositories I no longer needed. It felt a bit like digital spring cleaning.
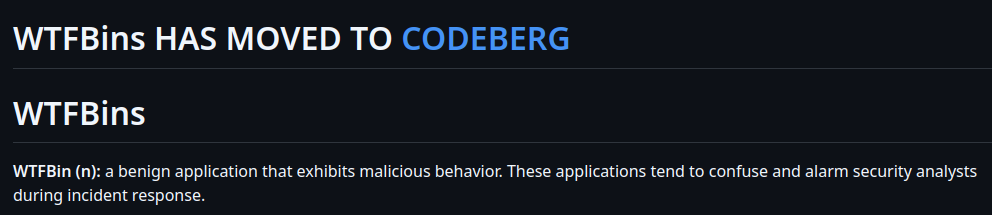
Speaking of archiving: do it. Mark your GitHub repository as archived (unless you feel comfortable deleting it altogether). Before I did,I added a final commit to the repo's README.md that communicates the move.
In case you're unfamiliar, the "archive" option is at the bottom of a repo's settings, in the "Danger Zone."
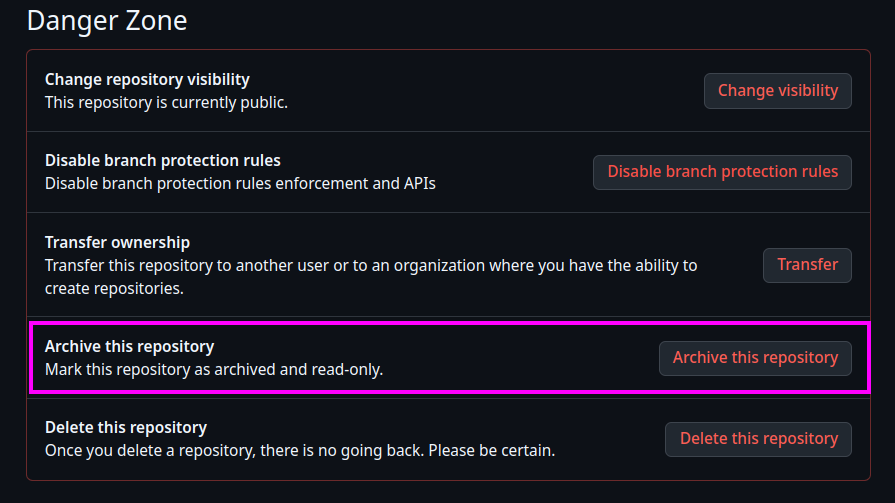
Insert Kenny Loggins joke here.
Now let's talk about auth. We all agree that SSH keys are the proper way to authenticate to GitHub, right? Right??
Great. Codeberg supports this, but there is a minor gotcha I ran into: for SSH key verification and signing, Codeberg/Forgejo requires either RSA 4096 or ed25519 keys. RSA 2048 keys are insufficient, so if that's what you've been using, you'll need to generate a new SSH key. You don't have to replace the old key; worry not. But you should make sure that the new key is added to ssh-agent. GitHub has excellent documentation on the process. Add the SSH keys to Codeberg in your user settings, and verify them with the provided instructions. You can now use SSH for auth and signing.
To finalize the migration, you'll want to update your local clones to point to Codeberg. Rather than manually changing the ref in .git/config for the origin remote, I find it best to add a new remote for Codeberg.
git remote add codeberg git@codeberg.org:username/reponame
git branch --set-upstream-to codeberg/branchname
Now, git push will send to Codeberg by default.
That's it! You've successfully migrated your repos. Not too hard, right? Let's get into the slightly more complicated parts.
Actions
Codeberg/Forgejo support Actions...kinda. While you can enable Actions for a repo, you need to bring your own runner. Maybe that's not such a bad thing. As we'll discuss later, this process forced me to interrogate whether I even needed Actions for my use case (turns out: no). But I did create my own runner in my homelab, following the Forgejo documentation.
One note on the runner setup: do not mess with the default labels unless you know what you're doing. Those labels determine not only where something runs, but how. Leave them alone unless you love troubleshooting.
If your repo has actions form GitHub, there's a good chance they'll work out of the box. The base "Forgejo Actions" are literally just clones of GitHub Actions. For the rest, I suspect there will be some refactoring involved. But there are opportunities for improvement there as well.
Pages
If Codeberg/Forgejo did not support static site hosting, this migration would have been much more difficult for me. In fact, I'd probably still be on GitHub, if I'm being honest. Even so, the Codeberg Pages service has some significant differences and sticking points to bear in mind.
First, Codeberg Pages requires a repo that has index.html at the root. That's what it's serving. This differs from both GitHub Pages deployment options. The "classic" GH Pages scheme uses a dedicated branch and folder, inside of which your web content could be deployed. This is useful for static site generators like Jekyll, which take source Markdown files and templates, and return a fully built HTML site. The published content and source are in the same place, although isolated to a dedicated branch to minimize cruft. The newer GitHub Pages method eliminates the branch entirely, relying instead on Actions to deploy an artifact to an "environment." In this model, your repo's source never needs to contain the built site; GitHub handles all that behind the scenes. A few (dozen) lines of YAML, and you're golden.
I quite enjoyed using the Actions -> Environments deployment pipeline for my static sites. It felt smooth—after a couple hours of fighting with YAML and other people's Actions, anyway.
So after a few false starts, I think I've arrived at the "best" way to do Codeberg Pages—for me, anyway. This is the process by which you are currently reading this blog post!
Side note before continuing: I use Zola as my static site generator, but that's just details. Whatever you choose will likely map on to this approach.
How I Do Codeberg Pages
Reading through the documentation, the first thing you need to internalize is that A Codeberg Pages site must have the web content at the repo root. If there isn't an index.html there, nothing's happening. So if you use a static site generator like me to build your site, we're already in a bit of a pickle. Your repo root is all your source config/Markdown/templates, not the built site. The docs state you have three ways to present your content as a Codeberg Page:
- A dedicated repo called
pages, which will be the "default" repo for your account - A
pagesbranch of a repo, with the web content at the root - A dedicated repo, again with the web content at the root
Let's discount option 1, since it is fairly limiting for no good reason. The docs are less clear that option 3 requires that the default branch be named pages, but it is the case. Option 2 is, in my opinion, much messier. Even though only a single repo is required, the diffs between a main and pages branch for a SSG will be huge, and that problem is never going away. Think through it:
- On
main, write your Markdown content. Commit the changes to history. Push to Codeberg. - Switch to
pages. Run the SSG to build the content. Here comes the awful part. - Delete the site source from
pages, then copy the entire build directory to the root. Commit changes. Push topages. - Do this every time you make a change.
Even if you were to automate this with arbitrary checkout actions, this is a nightmare for version control. Nuking and paving this way defeats the entire purpose of change tracking. Even if your pages branch ignored the source files, it'd still be a mess—especially because you'd need to ignore the web root content on main. No, this is just asking to be a disaster.
So I went with option 3. For every site I want to publish, I have two repositories:
- The site source
- The published site
Both are public because they are insensitive data, but if I wanted to make the source private, I could. That's actually an improvement over GitHub, especially without paying for a Pro account.
Since I had my own Forgejo Runner set up, my first thought was to create an Action that checkout out both source and Pages repo, using one to produce the changes to the other. However, doing so requires a separate authentication token, since the built-in one for the job only has permissions to the source repo. And after trying and failing for a while to get this working, I had a revelation:
I don't need Actions to do this. In fact, I don't need Actions for a lot. I was using them to be cool, and because it seemed like the "right" modern way to do things. But for this use case (and I suspect many others), what I needed was better accomplished by a few lines of Bash. It takes less compute, and I know everything that's happening.
We know we need two repositories. Instead of relying of YAML-driven DevOps stuff, why not use something a bit more elemental: Git submodules.
If we make our site repo a submodule of the source module, we can make our lives much, much easier.
You can see the resulting structure in this blog's source repo. To do similar, execute this in your source repo:
git submodule add git@codeberg.org:username/pages-repo pagesUPDATE: After a very helpful comment from a reader, I realized that you can actually do this with a single repo, but making the submodule a pages branch of your repo, which looks completely different from your main branch. This saves you the trouble of needing a second repository, at the potential cost of mixing concerns. I'm trying this out on this blog right now, and it seems to work okay.
To use a branch, you first need to create a pages branch locally.
git switch -c pagesThen you need to _completely restructure this branch. Run your site build to get the static content present, then put it at the root of the repo, while removing all the source. This is the part that feels unnatural, but it will work. Commit all those changes and then git push -u origin pages to create the remote pages branch. Then git switch - to switch back to your source.
Now you can add the new branch as a submodule in main:
git submodule add -b pages git@codeberg.org:username/source-repo pagesIf you're unfamiliar with using submodules, the new folder operates as a separate repo when inside it. So if you're in there, and you run git status or any other git commands, you're running them against the Pages repo instead of the source. By embedding them this way, it's trivial to run a build script like so:
#!/bin/bash

date=$(date)

zola build
cp -R public/* pages/
cd pages
git add -A
git commit -m "Rebuild: $date"
git push
cd ..
rm -rf public
git commit -am "Pages update: $date"
git push
Compare this to a Workflow. All that YAML, all that code from someone else, all that additional complexity in spinning up containers or maintaining runners—just to build a static site? Nah, we've been played for absolute fools.
While there are definitely valid use cases for Actions, I suspect they are fewer and further between than we've led ourselves to believe.
Note that I am saving no cruft here, as I can simply blow away the build folder after I copy its contents to the Pages repo for committing. Is it less "DevOpsy?" Maybe. But I control more of it, which ain't so bad.
Whatever your build process is, I encourage you to explore something like this rather than feeling handcuffed to GitHub's bells and whistles and trying to recreate them elsewhere.
We have our source set up, we have a dedicated Pages repo, and a sane build process.
Now for everyone's favorite part: DNS.
Custom Domains
I found the documentation on custom domains a little hard to parse. The information is there, just somewhat difficult to tease out. To use a custom domain with Codeberg, the first thing to know is how it creates aliases for your pages. Goes like this:
- If you're using a default
pagesrepo, the alias isusername.codeberg.page - If you have a dedicated repo, the alias is
reponame.username.codeberg.page- Don't forget the branch name has to be
pages!
- Don't forget the branch name has to be
- If you have a dedicated branch on the repo, the alias is
branchname.reponame.username.codeberg.page- (It's not made clear that the branch name has to be
pages, but it seems to have to be, based on my testing.)
- (It's not made clear that the branch name has to be
These aliases can be pointed to either by CNAME or ALIAS records. CNAME is much easier.
To point a custom domain to these directs via CNAME, you only need to add a single record—well, two if you want to also point www.customdomain.com to your site.
An ALIAS record complicates this a bit. In addition to the ALIAS that points to whichever alias is appropriate as described above, you'll need a TXT record with the same value, and a CNAME for www. that points to the Codeberg alias.
No matter which method you choose, there's one last bit of work to do to connect your new repo to a custom domain: the .domains file.
Every Pages repo using a custom domain requires a .domains file at the root, that describes the domains by which somehone will access the site. Your custom domain is always the first entry. This blog's looks like:
taggart-tech.com
ttc-pages.mttaggart.codeberg.page
Well, it did before I changed to using a single repo. Now the second line is
pages.taggart-tech.mttaggart.codeberg.page.
With that file in place and records saved, my freshly-built site is now available via Codeberg Pages!
There now, doesn't that feel better? You've reclaimed some ownership of your code, and nobody's trying to train LLMs on it, either. You've maybe even reduced some build complexity. Good on you!
There are lots of reasons folks can't migrate to Codeberg or another service like it right now. Many have begun self-hosting their code repositories. But if you're interested in what moving off GitHub is like, I strongly encourage you to explore Codeberg. Hopefully this guide can make some of the bigger lifts in the process a bit more manageable
Cheat Sheet
Hate reading? Here's the abridged version.
Codeberg Migration
- Create a GitHub personal access token ("classic" version) with repo privs.
- Create a Codeberg account.
- Run migrations for all your repos, using the token to pull issues, PRs, etc.
- Don't forget to mark private ones private!
- Make a final commit to the now-migrated GitHub repo indicating the move.
- Archive the repo on GitHub.
- Change your local clones to point to Codeberg as their upstreams.
- Lather, rinse, repeat for all your repositories on GitHub.
Codeberg Pages with SSGs and Custom Domains
- Set up a source repository for your SSG content.
- Set up a second, empty repo as its "pages" repo.
- Make the default branch
pages, notmain. - Initialize it with a placeholder
index.html. - If you instead want to use a branch of the source repo, make the
pagesbranch and reshape it from themainto contain only your web content. Commit and push to make thepagesremote branch. Switch back tomain.
- Make the default branch
- Add the pages repo as a submodule to your source.
- If going the one-repo-two-branches way, add the branch of your source as a submodule. Don't forget
-b pagesin the command!
- If going the one-repo-two-branches way, add the branch of your source as a submodule. Don't forget
- Add a
.domainsfile to the root of the submodule, using the custom domain first and appropriate aliases on subsequent lines - Run your SSG build command. Copy the results into the
pagesrepo. cdinto that repo, commit all changes, and push upstream.cdup and commit the submodule change, and push that upstream.- Script it out!
- Set up your custom domain with
CNAMEorALIASrecords, as described by the docs. - Wait for the records to update, and go visit your site!